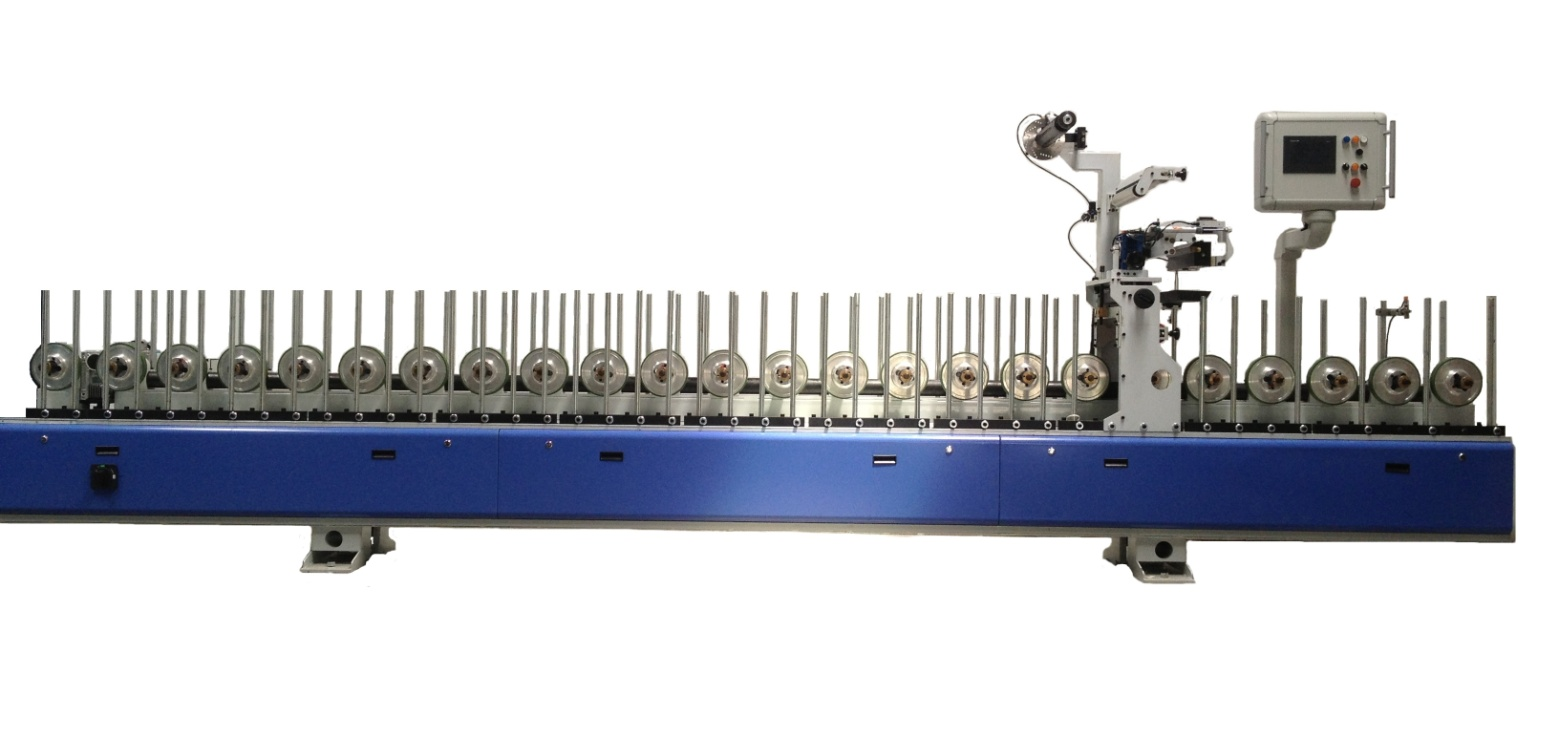
Operation safety
1、pay attention to warning sign on machine, operate safely.
2、forbid fire or explosive around machine
3、Donot open control panel before power off
4、make sure wire no damage
5、make sure wire no virtual connection
6、make sure emergency stop and pull wire r work normally and use them properally in accident.
7、Donot touch high temperature area
8、Wash with cold water if scald; if scald by PUR, donot move, or will bond flesh out, need send to hospital.
Attention
1.donot wear ring, hand watch, loose cloths when work.
2.tie the hair when work
3.Wear glove,goggles and tight clothes when work
Ⅱ、introduction of control panel
funtion and parameter of this machine set on touching screen
Start machine to open page, touch to interface
Screen show machine function parameter(work speed, quantity etc.), also can choose and fix parameters.
Touch screen includes words,numbers, icons, also touching button and number area.
Touch button: touch icon to choose function in screen(such as page up and down, counter reset).
Pop window: could open and close by touch switch directly on screen. Pop window is with catalogue, group and panel,which for introducing parameter dates.
Touch button: icon in screen r changeable which change parameter by touching.switch change everytime by touching. Such as change NO and OFF, Auto and Hand.
Number area: parameters r divided read-only and changeable. Will show a keyboard by touching changeable number,input parameter numbers and ENT for sure, or ESC for cancel.
2.1 touch button introduction
 go to next page
 back to last page
 、
、 touch to increase numbers,this icon is always with numbers, touch to increase certain numbers by every touch.
 、
、 touch to reduce numbers,this icon is always with numbers, touch to reduce certain numbers by every touch.
 OFF button: function parameters is off, touch to replace ON state.
 ON button: function parameter is ON, touch to replace OFF state.
 Automatic button: function is automatically, touch to replace Hand state.
 manual button: function is manually, touch to replace Automatic state.
So far,touch buttons,parameters, changeable date to control machines for different work.
2.2 menu page introduction
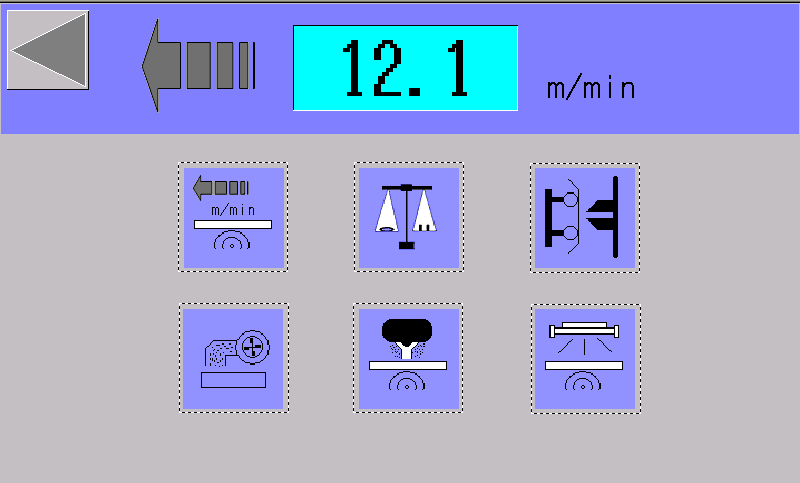
it shows the set speed of machine running, touch different icons into parameters mode, and edit parameters.
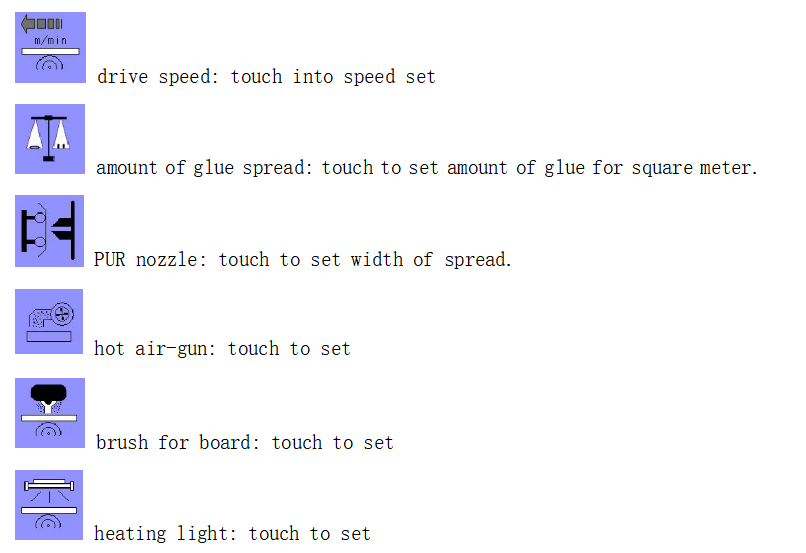
2.2.1 speed set interface

LINE: machine work speed
LOW: machine low speed
1、 This icon is for amount of line speed, line speed increase or reduce certain amount when touch everytime.it is can touch to set.
2、 This icon is for amount of line speed increase or reduce.it can touch to set.
3、This icon is for amount of line speed reduce everytime.
4、This incon is for amount of line speed increase everytime.
2.2.2 program set interface
Control PUR amount automatically by adjusting PUR pump speed, just input PUR amount and width of foil, controller will adjust pump speed to spread default amount. And spread speed controlled according feed speed automatically.
operation can be automatic or manual:
manual:PUR pump run as set speed, nothing to feed speed and width of foil
automatic:Controller adjust pump speed automatically according PUR amount needed.
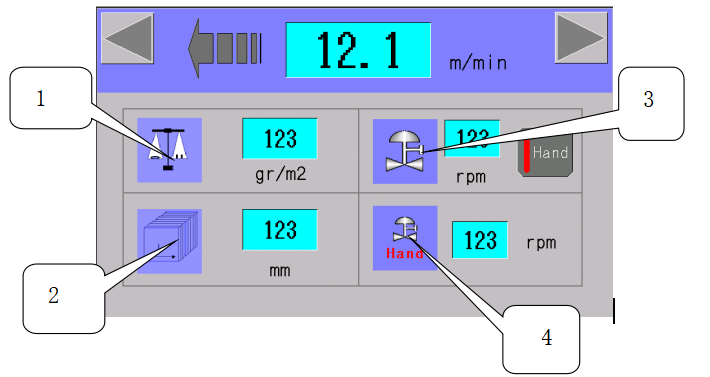
1、PUR amount set: input PUR amount as g/m².it works only in auto mode.
2、foil width set: width range of foil,match with PUR nozzle.
3、pump speed: show pump speed in ready-only.which can change between manual and automatic mode.
4、manual pump speed: Pump speed in manual mode, touch to set.
2.2.3 PUR spread set interface
This machine equipped a nozzle for spreading foil,which got 2 photoelectric switches, one for sensor feeding, one for sensor nozzle near to foil by pneumatic system.
Photoelectric switch sensor feeding and nearing, controller will start PUR pump to supply PUR. Pump speed has been set in controller.
1、nozzle has 2 work modes to choose in control panel:
manual:choose only in debug or maintain machine, control solenoid valve is ON.
automatic:Air cylinder push nozzle to foil, start the PUR pump and spread PUR on foil to wrapping, when sensor feeding. There is security switch on nozzle, nozzle will stop spreading and back to standby position,when foil break,security switch cannot sensor foil in automatic work mode.
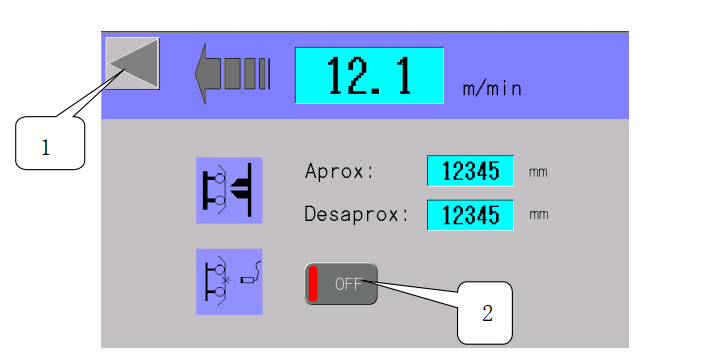
1、ESC quit PUR set interface;
2、ON/OFF:Control security switch on and off.
Aprox:Nozzle push-in pulse counter, count when profile feeding. It is for adjusting when air cylinder push nozzle to work.
Desaprox:Nozzle backward pulse counter, count when last profile left. It is for adjusting when nozzle back to standby position.
2.2.4 hot airgun set interface
Function choose from pop window.
automatically work in those conditions :
1、photoelectric installed on feeding entrance.
2、touch button is ON state.
3、 drive system is running.
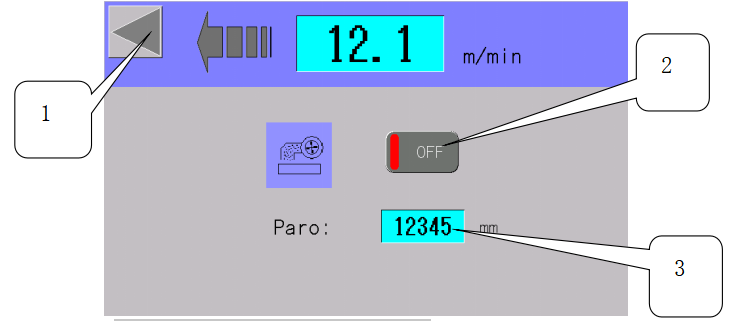
1.quit hot airgun set interface.
2.on or off hot airgun
3.Paro:If photoelectric switch cannot sensor feeding when hot airgun started, airgun will count to power off, the parameter is adjustable.
2.2.5 brush set interface
Function choose from pope window
Brush start and stop by touch button ON/OFF.
Brush start when machine is running.
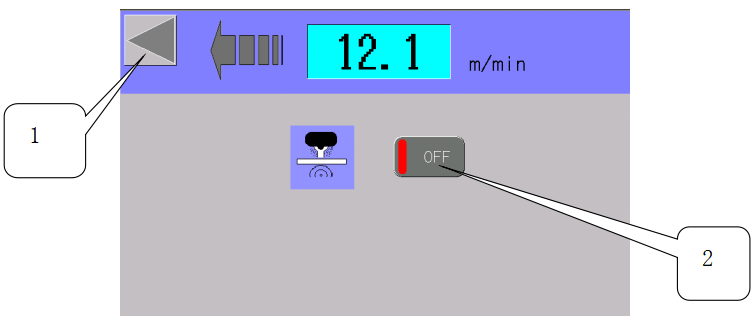
1.quit set interface
2.ON/OFF:Start and stop brush work
2.2.6 heating lights set interface
function choose by touch screen heating lights start automatically in those conditions:
1、photoelectric installed on feeding entrance.
2、touch button is ON state.
3、 drive system is running.

1.quit set interface
2.ON/OFF:start and stop heating lights.
3.Paro:Heating lights start, but photoelectric switch cannot sensor feeding. Heating lights will countdown to stop automatically, this parameter is adjustable.
Ⅲ、 nozzle maintenance
3.1 structure
01:nozzle and pipe connector 02:resistance heating
03:PUR spread adjustment gasket 04:left counter position adjust
05:right counter position adjust 06: spread off cylinder
07:nozzle body 08: nozzle top cover
09: nozzle bottom cover 10: nozzle fix screw
11:nozzle fix screw 12: positioning pin
13:adjustable gasket slots 14: temperature probe
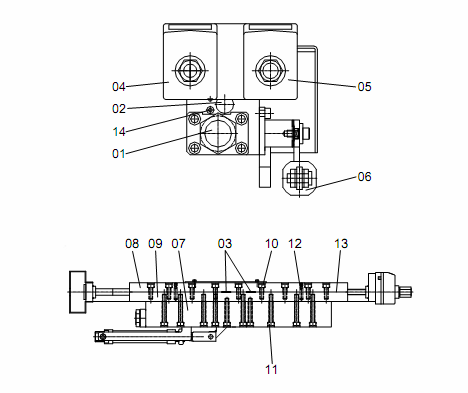
3.2 parameter
min width: 25mm
max width: 330mm
heating power: 1000W
3.3 spread width adjustment
Screw left and right counter to adjust spread width, the sum of left and right numbers is spreading width.
Operation warning
Spread width adjust only when PUR and nozzle achieve work temperature, cannot adjust without work temperature, or gasket will be damaged in screw puch.
Should adjust slowly, cannot fast, or gasket damage.
Min adjustment width for every gasket is 12.5mm, if beyond the range, adjustment will default.

Screw counter will be hard When width adjusted to min or max. It should stop screw, or will be damaged.
3.4 PUR nozzle maintenance
3.4.1 daily maintenance
3.4.1.1 operator must do before work
1、heat nozzle to work temperature
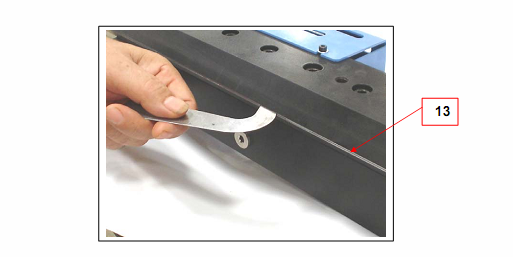
2、move thin sheet to clean slot lightly(13);
3、 test width adjustment from min to max(03) and observe normal or not;
4、adjust width(03) to work state
5、pump PUR until out of pipe and nozzle
6、clean spread part and top cover(08)。
3.4.1.2 operator must do after work
1、keep nozzle temperature
2、 move thin sheet to clean slot lightly(13);
3、test width adjustment from min to max(03) and observe normal or not;
4、close width(03) to min 12.5mm
5、seal nozzle
3.4.2 weekly maintenance
3.4.2.1 operator must do when machine power off
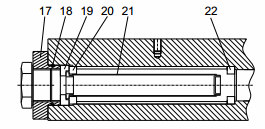
clean or change filter
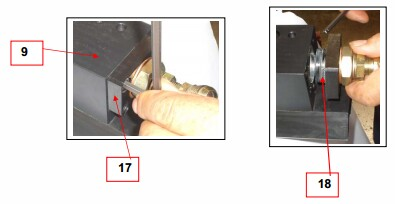
1、 open nozzle filter fixer(17);
2、tear down filter(21);
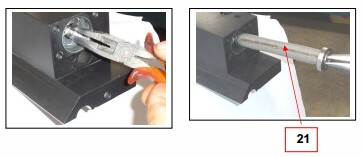
3、change new clean filter on connector(18)。
Soak dirty filter in solvent one week for standby
attention:donot soak sealer in solvent(18)
3.4.3 nozzle dismantling and maintenance
Nozzle is easy wear out device, so must be careful in dismantling, and dismantle in work temperature. Or damage nuzzle to PUR leakage or error.
follow below steps to dismantle nuzzle:
1、take security glove
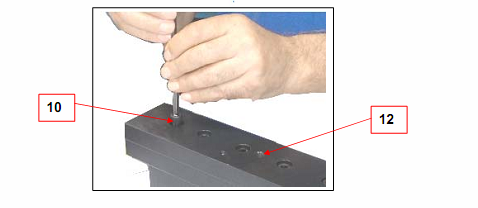
2、 release fixing screw of nuzzle(10);
3、release fixing screw of top cover(08),dismantle positioning pin(12)from bottom cover(09)
4、 move top cover carefully then will see inside structure .donot crash adjustment sheet(03);
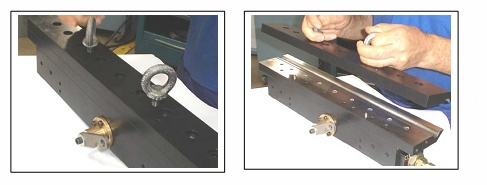
5、discharge left PUR glue
6、clean adjustment sheet with solvent(03);
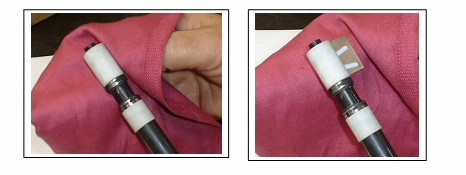
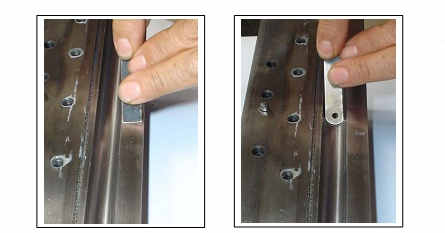
7、scratch glue off top and bottom cover with metal sheet carefully, donot damage.
8、clean nozzle device with solvent, specially adjustment sheet(03).
9、Install reserve dismantling way.
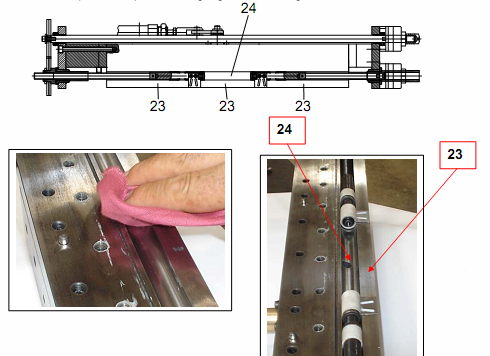
3.4 change sealer
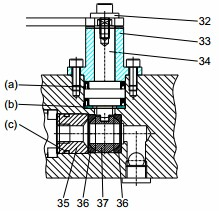
1、pick out filter support(9);
2、pick out sealer(15);
3、 pick out ring(a)and(b);
4、pick out glue switch(16);
5、 move off screw(17),remove drive bar(18);
6、 remove nozzle sealer(c)and(d);
7、 remove valve switch(19)and sealer(e);
8、clean our removed parts and screw hole with solvent.
9、need change sealer(c) whenever move drive bar,or will be glue leakage;
10、install reverse dismantle way。
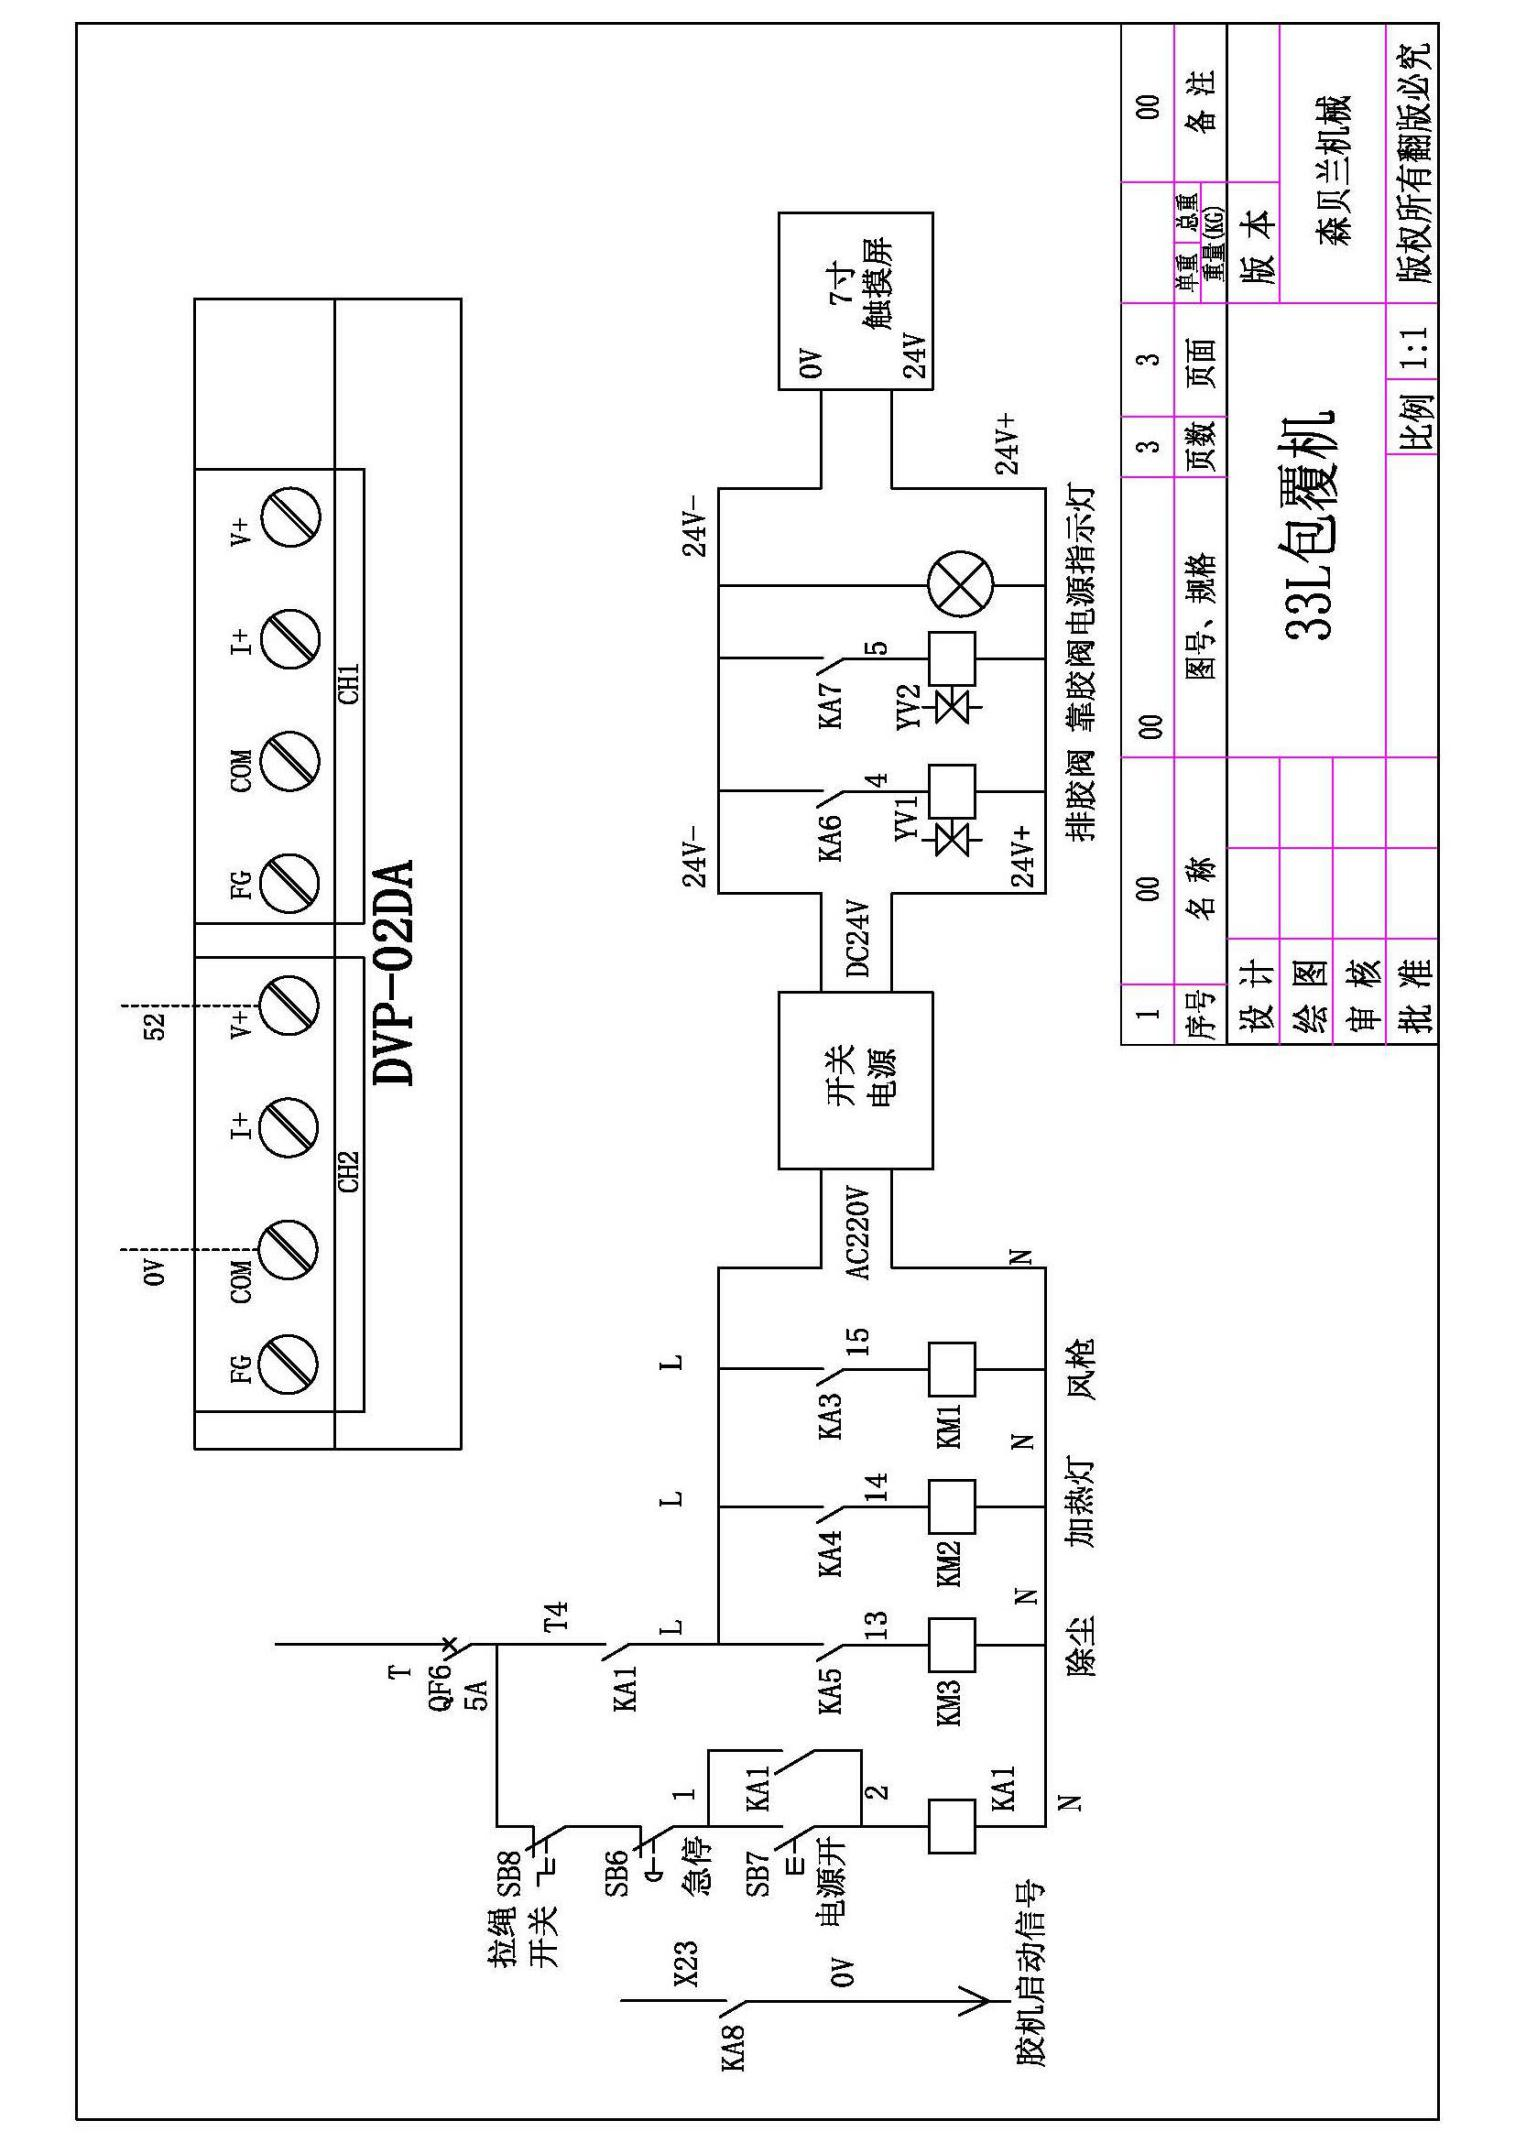
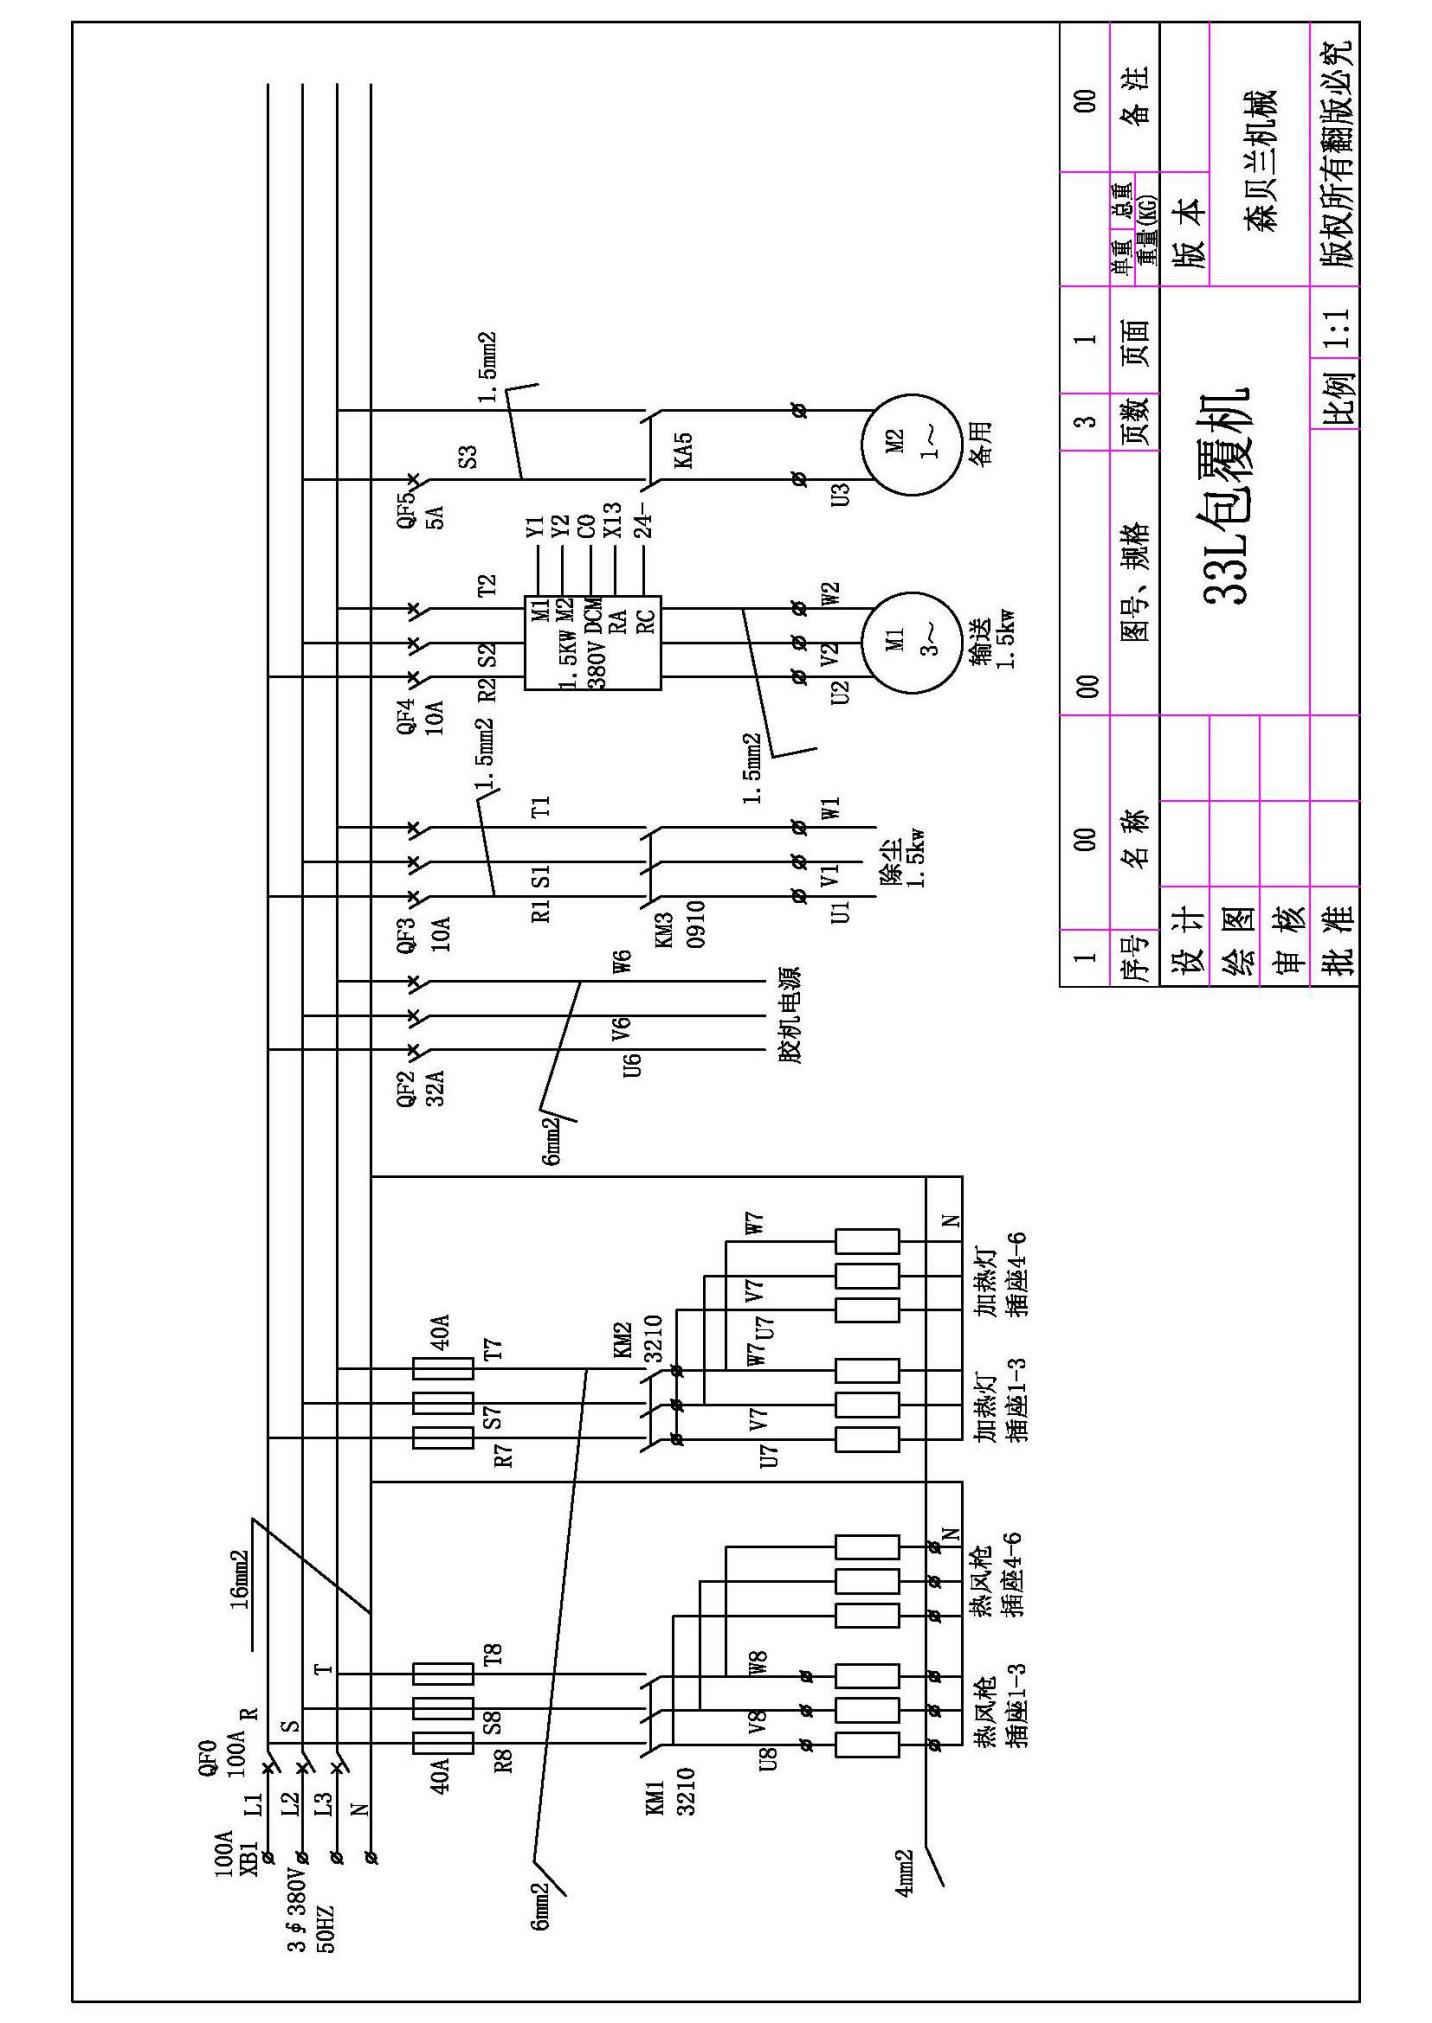
Ⅳ、 circuit program
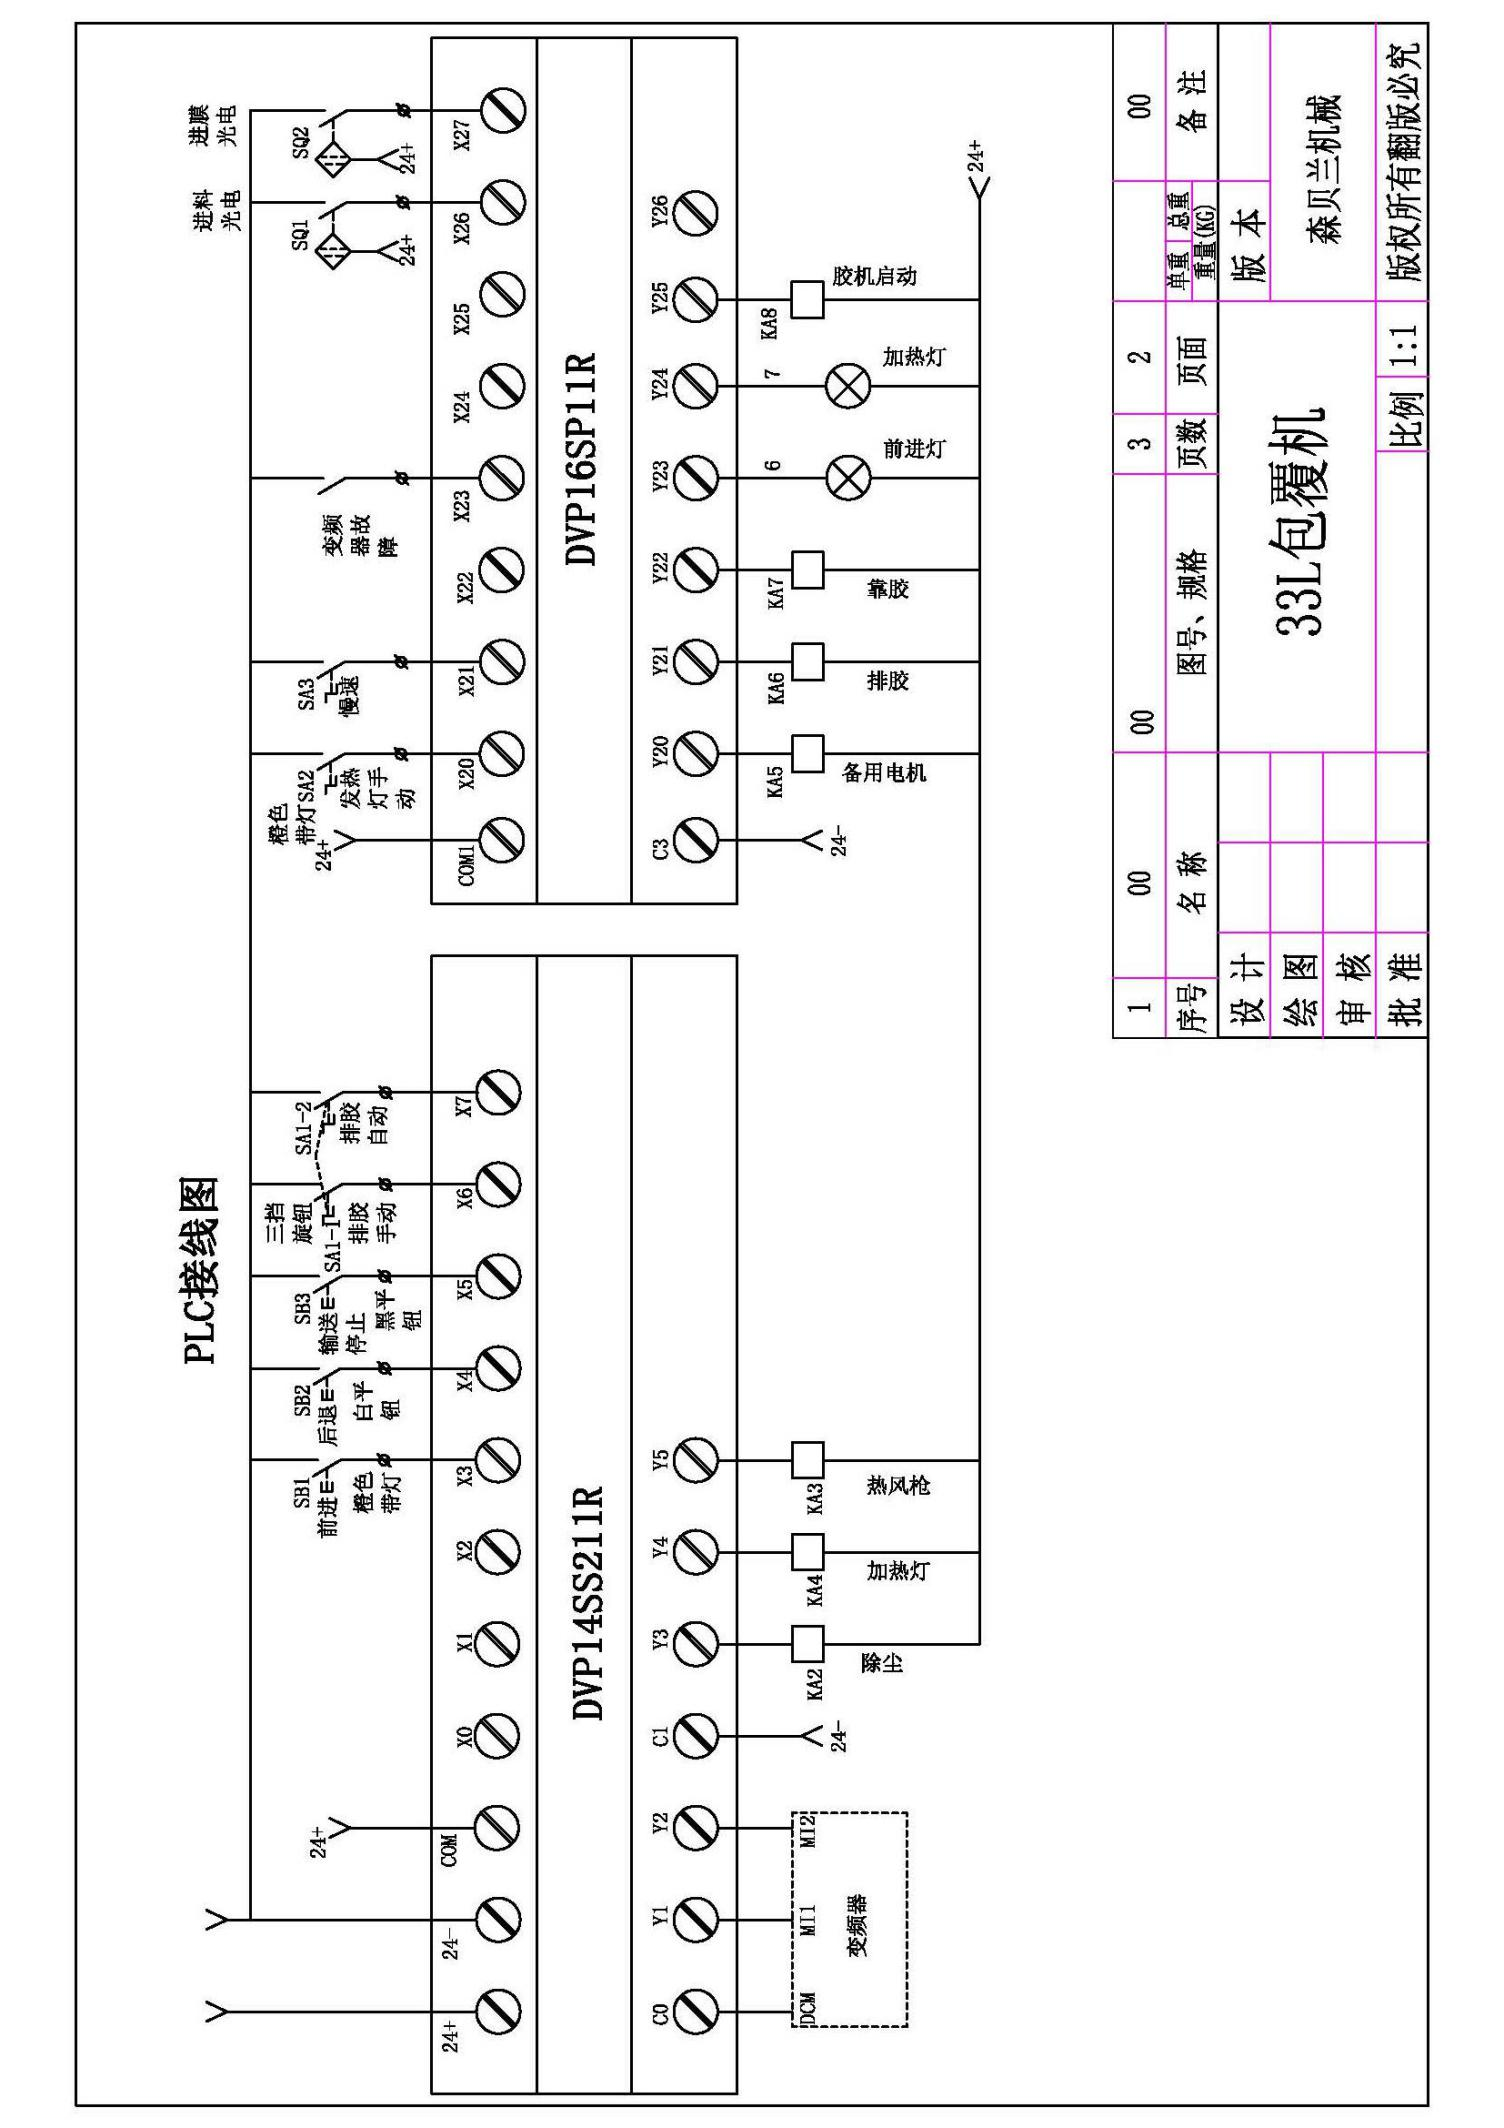
Post time: Jun-06-2022


